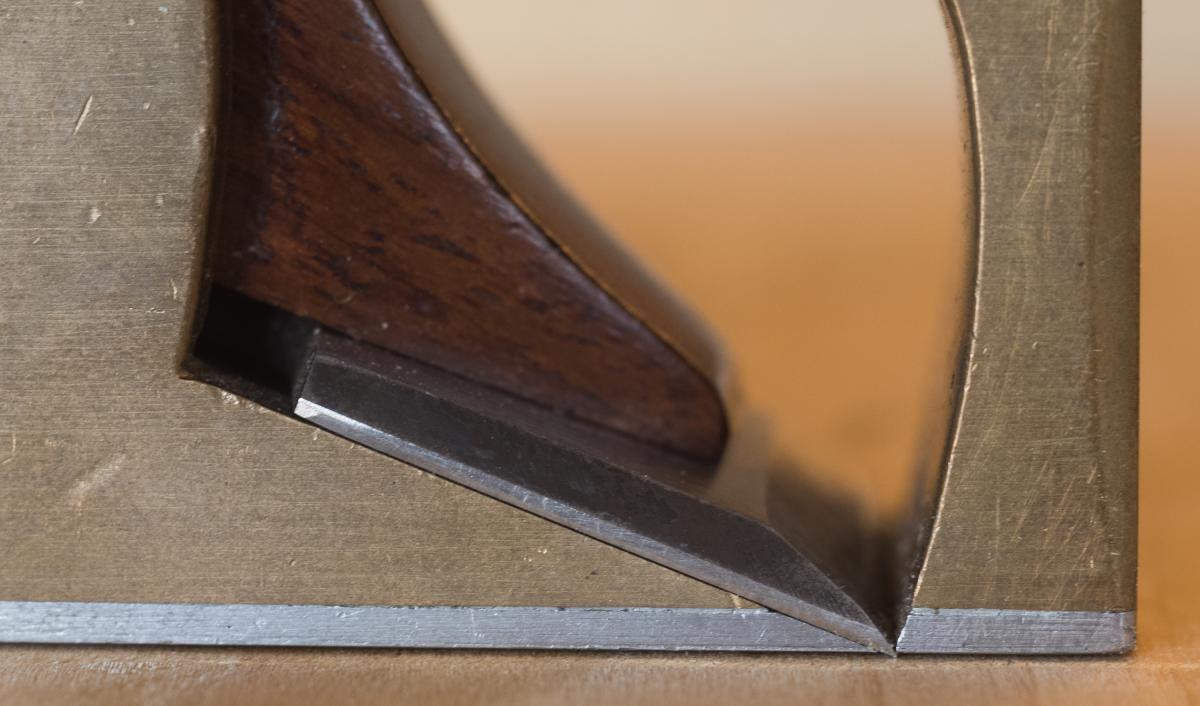
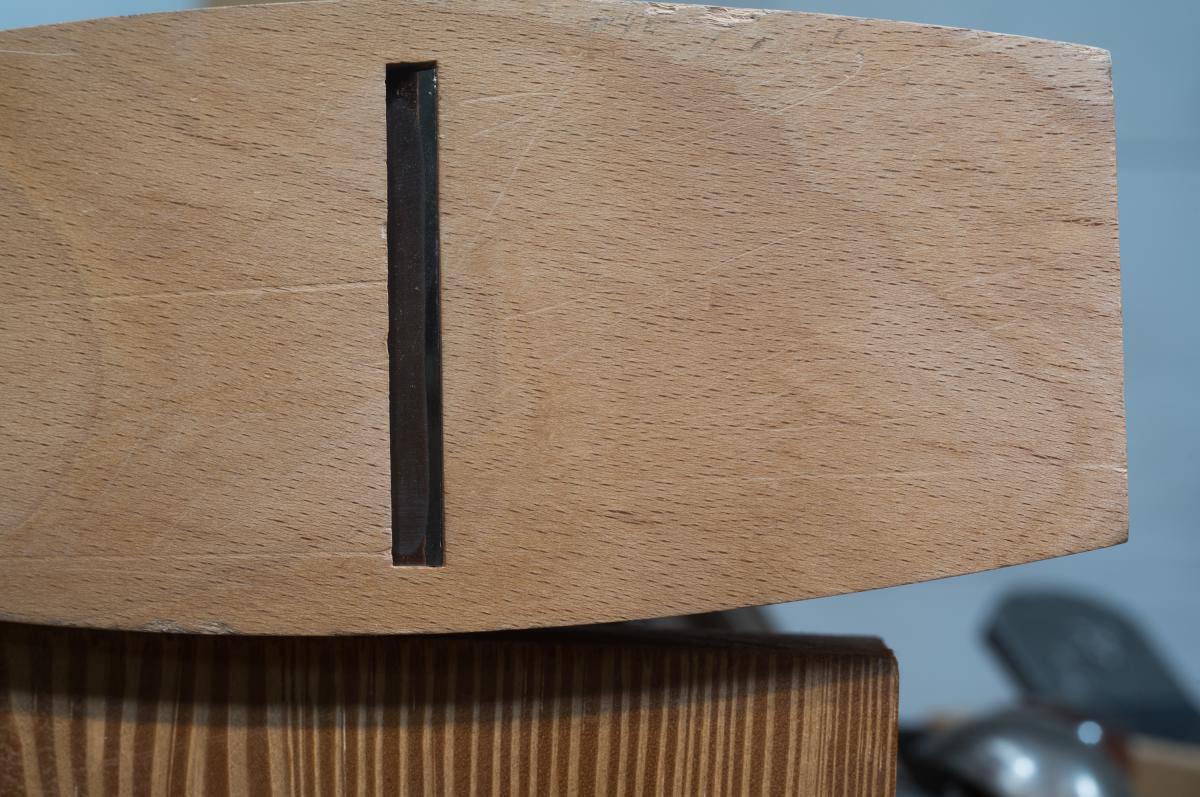
Nearly new Norris bullnose plane with a very, very narrow crisp mouth
There are many ways of preventing planing tear-out by breaking the shaving. (As I have written previously, the thicker or stronger the planed shaving, the easier it is for the shaving to have enough strength to pry wood out ahead of the cut - tear-out.) Each method has advantages and disadvantages, and methods have evolved with advances in plane making technology. Understanding the engineering may make picking an approach less arbitrary.
The direction of the grain can affect the extent of tear-out; figured woods in which the grain is changing all the time can become very difficult to plane. You can find considerable grain directional change even in regular materials.
Planning a thin shaving solves a lot of problems, but if the wood has weird grain, it might not be enough. If you're planning for dimension rather (than just for a final pass), a thick shaving is simply faster. The question then becomes, how to get a thicker shaving without tear-out?
As we explored in the last installment a thick shaving has strength. As the shaving gets longer and is forced against the plane iron, the longer length acts like a longer lever and adds strength to the shaving until it is strong enough to pry up material in front of the cut. A short shaving, being a shorter lever, has less strength. What we really want is an effective way to keep the effective length of the lever very short. The two most important methods for preventing tear out are (1) making sure the edge of the plane body that is just in front of the iron is close to the iron and actually contacting the wood, so the word can't be lifted up and (2) breaking up the shaving as it's being made, so the shaving has no strength and cannot force up material.
The first way to do this is to have a very tight mouth on the plane. The photo above is of a Norris Bullnose plane from the 1930's. It's nearly new, with almost no wear on the plane body and a iron that has never been ground. The mouth is absurdly fine, about 1/64". Since bullnose planes are "correcting" planes that are used them in odd situations, having some tear-out protection is very important. A tight mouth, pressing down right in front of the blade would prevent a thick strong shaving from prying up wood, and the shaving would bend and break against the edge of the tight mouth, thereby weakening further.
When you're using a plane for dimensioning wood, a flat sole helps in creating an accurate flat surface. But high spots in the material being planed can lift the body of the plane slightly and raise the mouth of the plane from contacting the wood. This defeats the action of a tight crisp mouth. One solution that is especially used on wooden plane is to hollow out the front part of the sole so that the area immediately in front of the blade stays flat down in full contact with the wood.
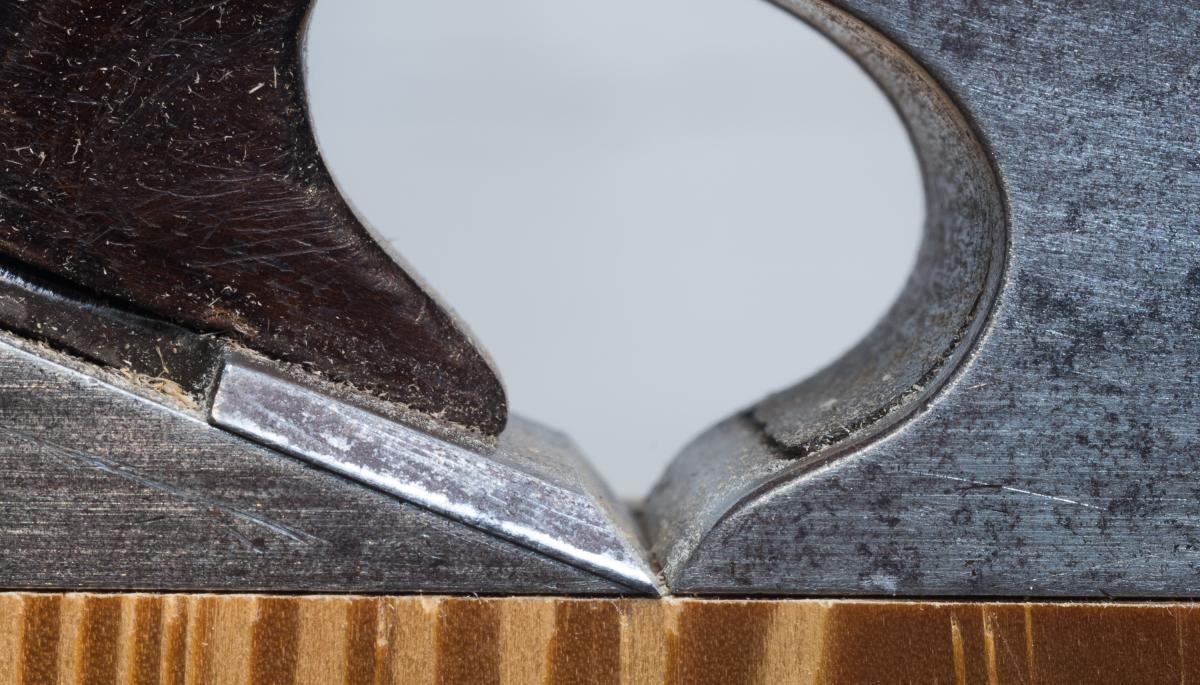
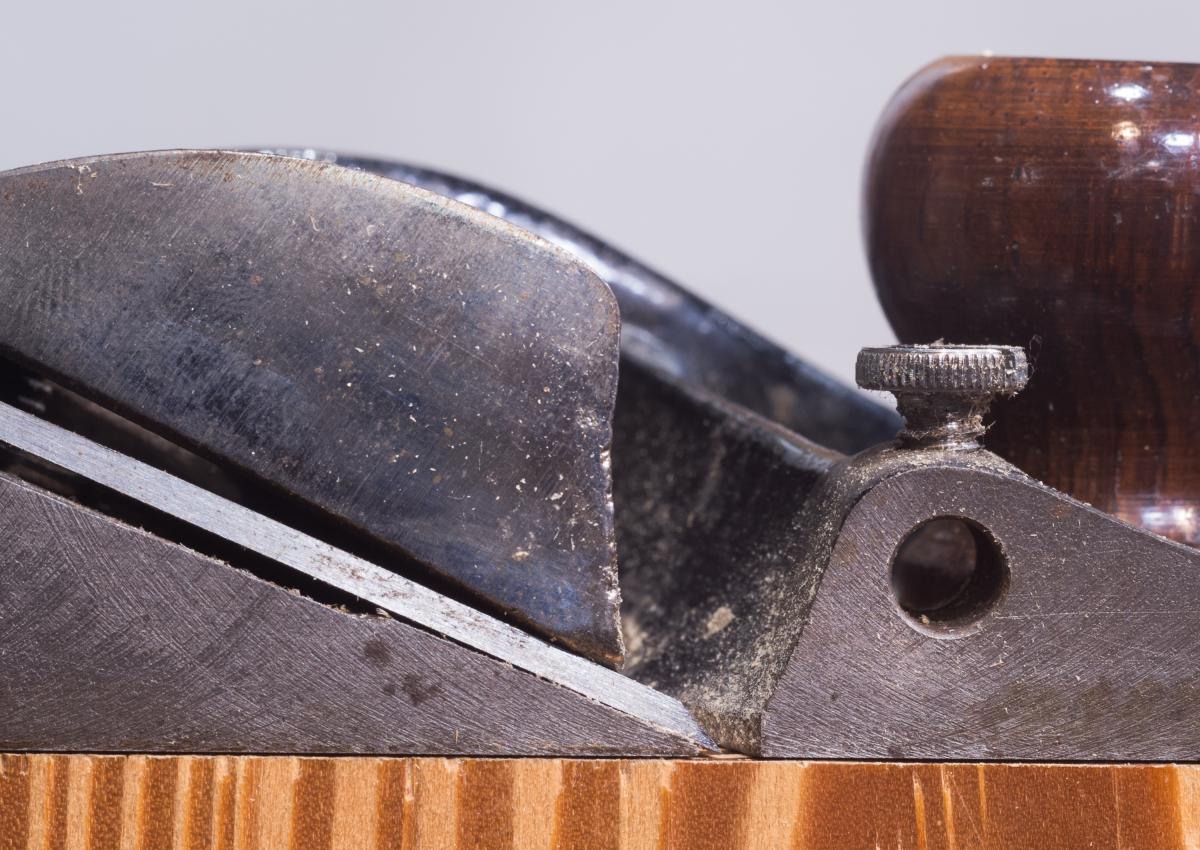
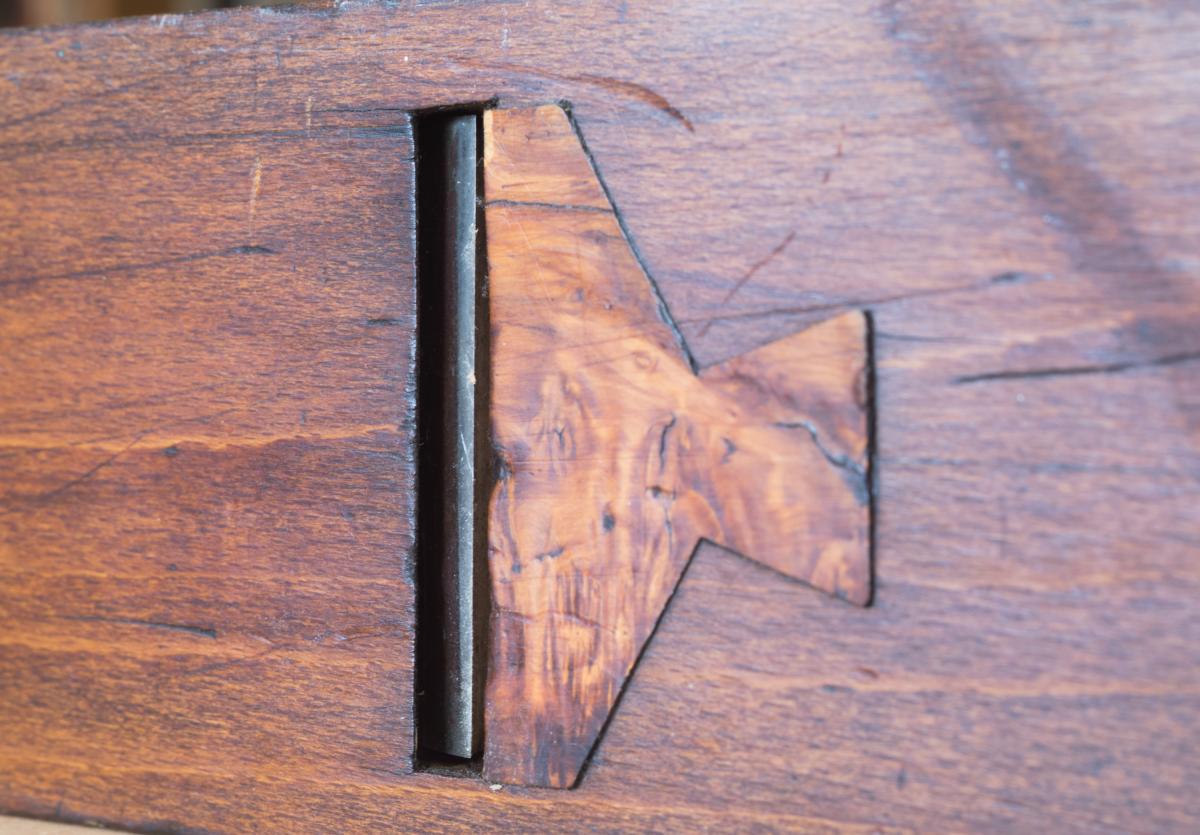
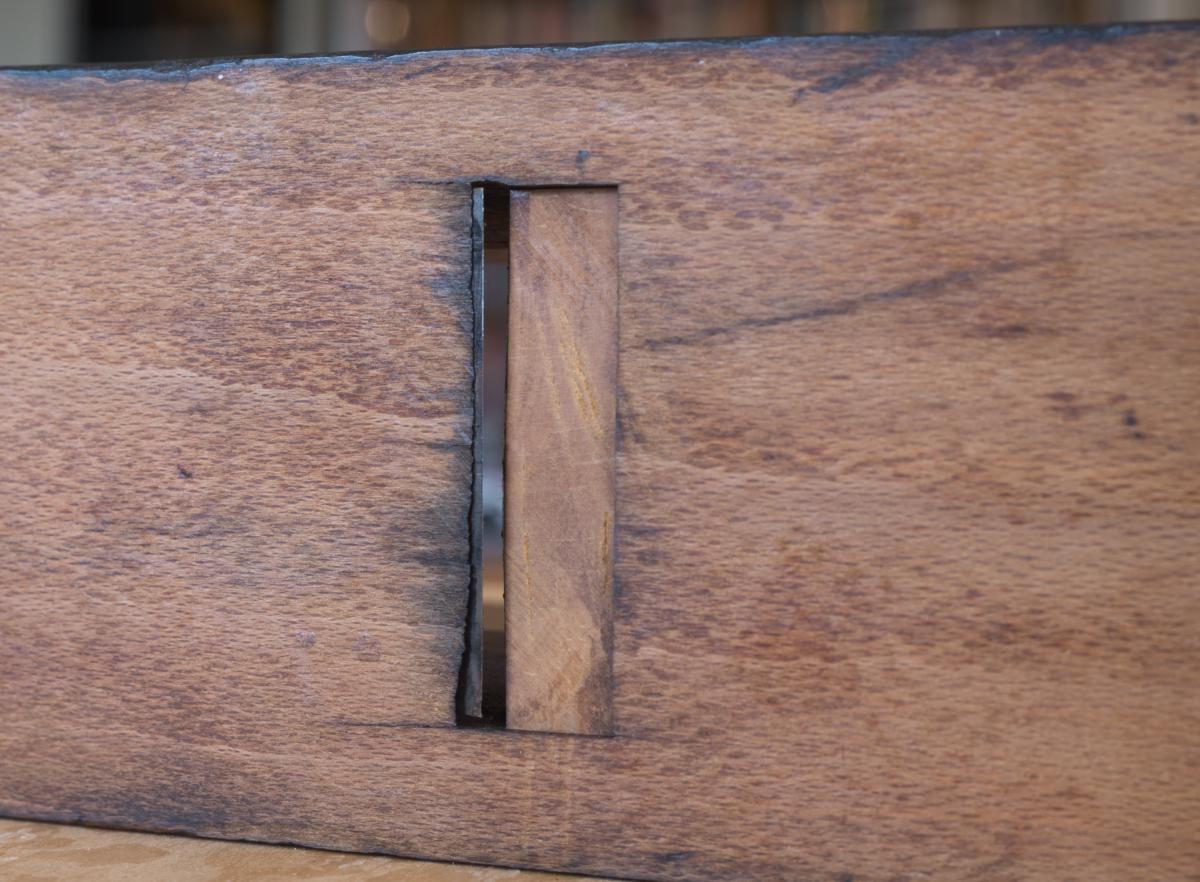
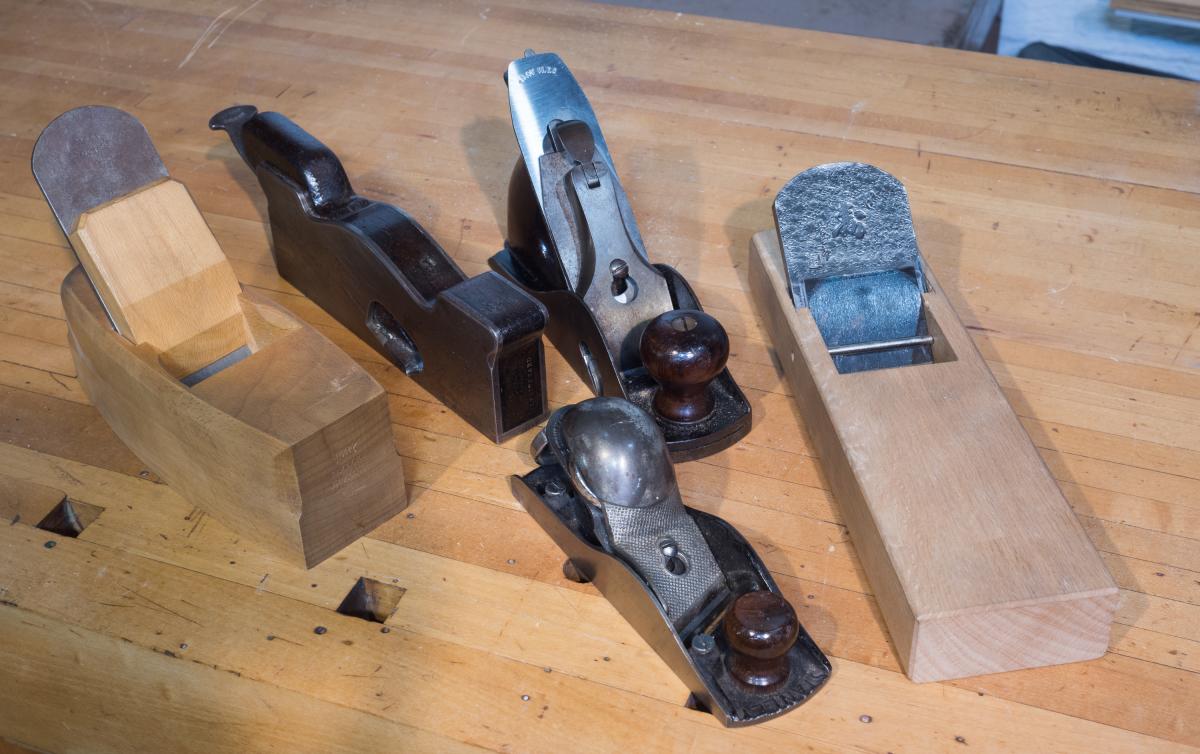
The next two photos show a well-used Norris No. 7 shoulder plane and Stanley No. 140 rabbet-block plane (the latter plane with its removable side removed showing one limitation of a fine mouth - wear). As you use the plane, the front edge in front of the iron will start to round over. Chip breaking and lift prevention will consequently decline. This problem is far, far worse on wooden planes, because wood wears faster. Norris no. 7 shoulder plane with a tight but worn mouth Stanley no. 140 rabbet block plane.
I used the examples above because with these types of plane you can actually see the geometry of the iron and mouth without slicing a plane in half. But having a super-fine mouth on a plane was the best method available in the 18th century. We see it in this early mitre plane by Gabriel C. 1790 and on this modern 18th century wooden smoothing plane reproduction by Clark & Williams. Wooden planes face another problem in addition to wear: Bevel-down wooden planes traditionally had tapered irons held in place with a wedge. As the blade is sharpened and gets shorter, the blade at the cutting edge gets thinner - effectively rendering the mouth of the plane wider. (See group images below for the planes that are detailed in this and some forthcoming blogs.) This late 18th century mitre plane by Gabriel has one of the finest mouths I have every seen. The gap between iron and mouth on this Clark & Williams plane is far under 1/64"
The mouth widening problem from wear or sharpening is a serious issue for bevel-down planes. Many shops had a hierarchy of using their newest planes with the finest mouths for the most critical work, and then as the plane wore, demoting them to more general work.
Many mechanical solutions to this problem were implemented. The most common is the installation of a patch to repair the open mouth in front of the iron. In this early example of a plane possibly made by Christopher Gabriel, (below) what looks like a Boxwood patch has been fitted to the plane. It's a well done repair but - and this shows a typical problem with mouth repairs - the wood body has shrunk and the plug is now proud, thereby preventing proper use of the plane. (Fixing the problem is pretty simple though, and I would fix it if it were a plane I actually used.)
The patch on the sole to repair the mouth on this Gabriel jointer plane is elegantly installed
I have written previously about iron fronted smooth planes which had a iron piece installed in front of the blade which did not wear like wood, and - at least in theory - could be precised positioned for a very fine mouth.
The most interesting approach to taking up wear as the plane got used can be seen in this wooden miter plane by John Green that dates from the very early 19th century. The plane has several problems associated with bevel-up wooden mitre planes, but here the solution to the fine mouth was to put a boxwood plug in in front of the mouth, which can be knocked in deeper to close up the mouth as the wood wears. You see this type of mouth plug in some Japanese planes as well.
From underside you can see the mouth plug of this John Green mitre
I was planing to write about all the chip breaking ideas in one blog entry, but it's just too involved. So in the next installment, I'm going to take a look at what happens when you raise the angle of a blade - when you use other types of blades to reduce tear-out. I'm saving cap irons for last.
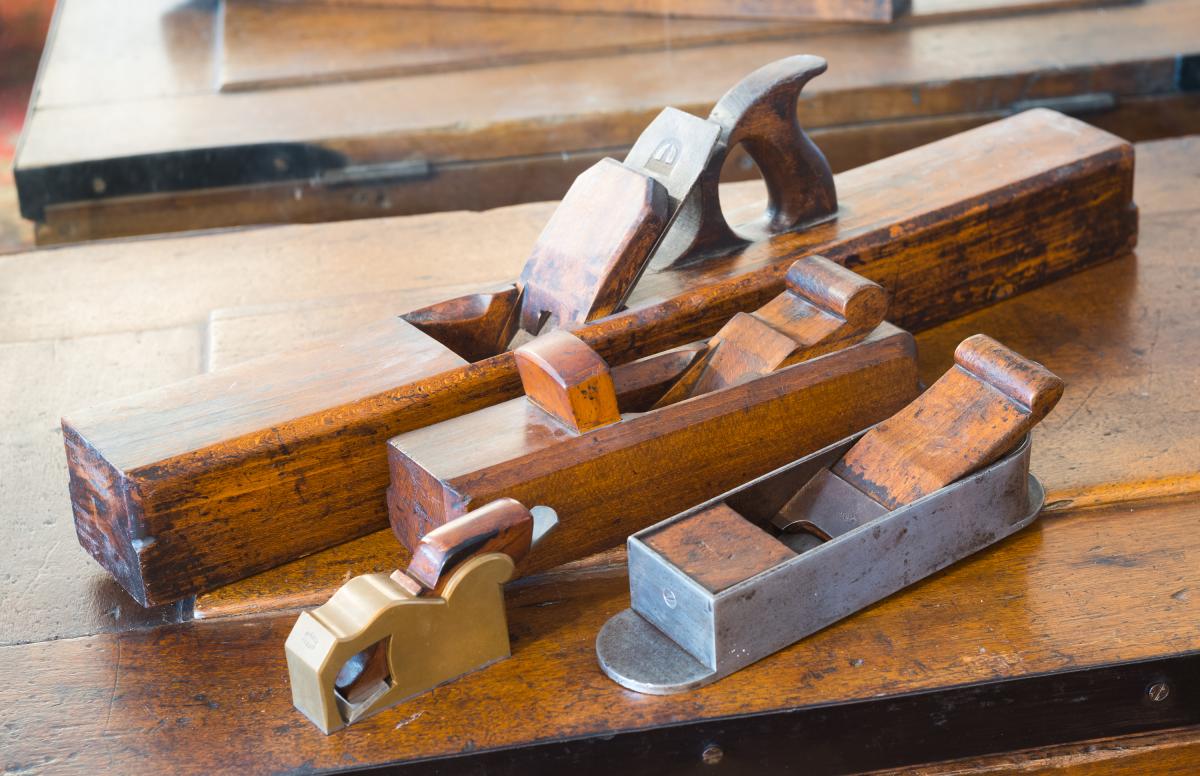
l-r - f-b: Norris bullnose; Gabriel Mitre; John Green mitre - with mouth plug; Gabriel jointer
l-r: Clark & Williams;Norris no. 7; front - Stanley 140; rear - Stanley 10 1/2; Tsunesaburo


 Joel's Blog
 Built-It Blog
 Video Roundup
 Classes & Events
 Work Magazine